
0
Owner's of the Broilmaster Gas Grill H4PK-1 gave it a score of 0 out of 5. Here's how the scores stacked up:


B101623-2-0112 Page 27
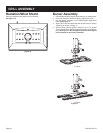
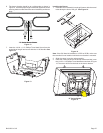
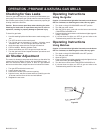
6. The burner bracket should be at a slight angle as shown in
Figure 12. Once the proper angle is achieved, tighten the screw
securing the burner bracket to the venturi assembly and burner
body.
11°
“H” SERIES BURNER SHOWN
C
L
“H” Series Burner Shown
Figure 12
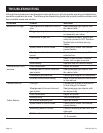
7. Insert the 1/4-20 x 1 1/2 Phillips Truss Head Screw from the
underside of the grill and secure with the 1/4-20 Hex Nut. See
Figure 13.
Figure 13
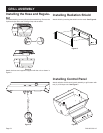
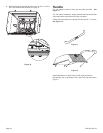
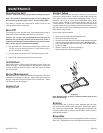
Installing the Burner
1. Insert the burner assembly into the grill bottom with the venturi
tubes facing the front of the grill. See Figure 14.
Figure 14
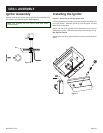
Note: If the Grill Head is installed on a PCB1 or DCB1, make sure
the cart shield is not installed until the burner bracket is mounted.
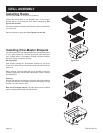
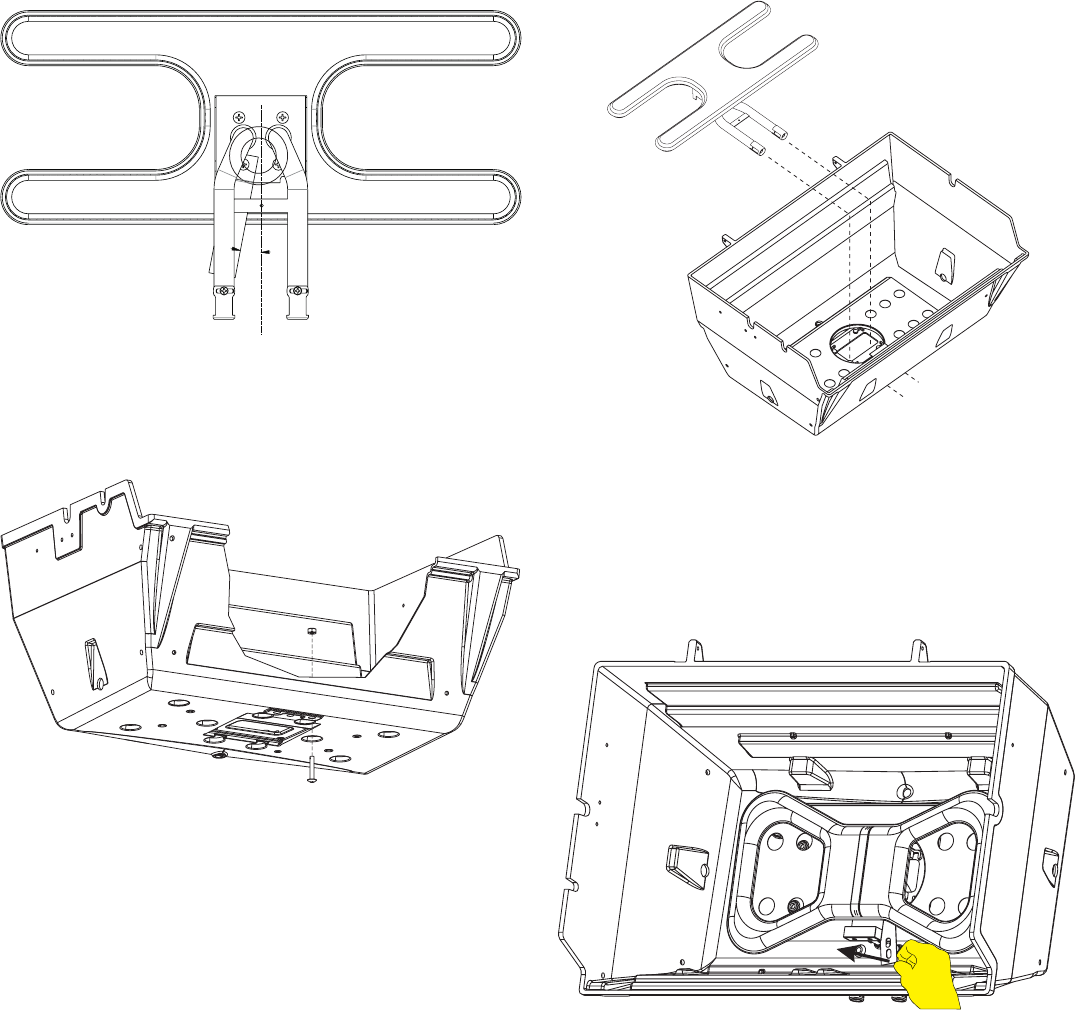
2. Slide the venturi on to the valve assembly.
3. Raise the unsecured end of the burner bracket and slip it over
the 1/4-20 x 1 1/2 Phillips Truss Head Screw as shown in Figure
15. The screw will t into the hole on the burner bracket.
“P” Series Shown
Figure 15


Find Your Products By Category
Please Login
