0

Out of 0 Ratings

Owner's of the Bayou Classic Cooktop SP10 gave it a score of 0 out of 5. Here's how the scores stacked up:
  • Reliability

    0 out of 5
  • Durability

    0 out of 5
  • Maintenance

    0 out of 5
  • Performance

    0 out of 5
  • Ease of Use

    0 out of 5
Page 29
of 36
 
26
11. When fr
ying is complete, first turn off gas supply at the cylinder valve, then close regulator valve.
Do this before removing the basket from hot oil.
12. Wearing protective gloves, carefully remove basket from oil. Keep basket above the pot to drain.
13. After hot oil has sufficiently drained, carefully remove food from basket. Allow liquid to cool to 115˚F
(45˚C) or below before moving cooking vessel.
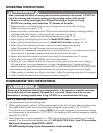
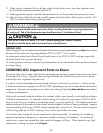
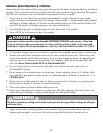
WARNING
Fryer thermometer should not be inserted into food or touching food when measuring temperature
of cooking oil. End of the ther
mometer stem should be at least 1 inch below oil level.
COOKING NOTE:
When fr
ying the very first basket of food product, the food may reach proper doneness before the cooking
oil returns to the optimum frying range between 325˚F to 350˚F. This is normal.
For subsequent basket loads of food, the oil should return to the 325˚F to 350˚F cooking range while
the food product fries to proper doneness.
As cooking process continues, a steady frying temperature can be maintained with burner flame adjusted
to a lower setting.
CAUTION
Wait for oil to cool to or below 115˚F (45˚C) before pouring into its plastic container.
Hot oil can melt the plastic and cause severe bur
ns or bodily harm.
COOKING OIL: Important Facts to Know
Since early times when human civilization first developed pots a
nd pans, people have used various forms
of cooking oil for frying. Originally animal fat (grease/lard) was used for frying which now is mostly
replaced by olive, vegetable and peanut oil.
It is almost universal knowledge that over-heated cooking oil will catch fire and burn. Cooking oil has
a flashpoint temperature ranging from 550˚F to 700˚F, depending on type of oil used, altitude and ambient
temperature. However, most people do not realize that cooking oil typically does not burn when below
its flashpoint temperature.
Cooking oil contained inside the confines of a stockpot, skillet or pan (vessel) is quite stable when below
its flashpoint temperature. For example, heated cooking oil at optimum frying range of 325˚F to 350˚F
does not catch fire even if a flame is accidentally placed in contact with the oil. This stable characteristic
enables cooking oil to be used on kitchen stoves inside hundreds of millions of homes worldwide. Imagine
someone smoking while frying at 350˚F and the cigarette falls into the hot oil. The fire inside the cigarette
will be extinguished by hot 350˚F cooking oil very similar had it fallen into water.
On the other side, cooking oil must be respected and used responsibly. As cooking oil is heated up
approaching flashpoint temperature, it becomes unstable and begins to breakdown. As cooking oil
breaks down, vapors are created that when mixed with oxygen, will burn. When heated to very high
temperatures, cooking oil vapors will self-ignite.
27
The following is a typical scenario of what happens as vegetable oil, contained in a cooking vessel, reaches
its flashpoint temperature and self ignites:
The oil first becomes darker and emits an unpleasant odor
.
At about 440˚F, the oil begins emitting a pale vapor smoke.
At about 500˚F, the smoke turns black.
Soon a heavy, thick black smoke belches out.
At about 600˚F, a small flame flickers out from the oil. At this point the cooking oil has reached its
point of self-ignition.
If the heat source below the vessel remains engaged, the flame will quickly grow.
All the while cooking oil burns, thick black smoke continues to belch forth.
Another point many people do not know is that over-heated cooking oil that catches fire can make a
huge flame. For example, a small 12" skillet with only 1/2" deep of cooking oil can create a flame
7- ft to 9- ft high! A large cooking vessel containing up to 3 gallons of cooking oil can create a flame
up to 15- ft high!
On average, every year in the U.S. there are 80,000 kitchen/house fires caused by burning cooking
oil that are responded to by a Fire Department. Imagine a 3- ft high kitchen stove supporting a cooking
vessel emitting a 7- ft flame… that is a dangerous house fire!
The vast majority of these kitchen fires are the result of leaving cooking oil unattended. Simply answering
the door bell, phone or tending to a crying child are sufficient distractions that allow a 12" skillet with
1/2" cooking oil to over-heat and catch fire.
Eventually, burning cooking oil will self extinguish. Actual burn out time does vary but on average:
A 12" skillet with 1/2" deep cooking oil will self extinguish in about 5 - 7 minutes after first flame emits.
A cooking vessel with 3- gallons of cooking oil will self extinguish in about 20 - 25 minutes after the
first flame emits.
Either way a very large flame is raging long enough to spread fire to any combustible structure that it touches.
Another well known point is that cooking oil can be re-used. Most cooking oil brands recommend using
oil 4 - 5 times if it is strained, and can be stored in a cool dark place from 9 - 12 months.
During the storage period bacteria will form on poultry, fish or animal fats remaining in the oil. This
bacteria is quickly killed when the oil is re-heated. Prior to using again, it is recommended that you smell
the cooking oil. If it smells unpleasant or rancid, discard properly and use new cooking oil.
However, most people are unaware that used cooking oil has a reduced Smoke Point and Flash Point
temperature due to partial breakdown of the oil. (Partial break-down is caused by previous use and
bacteria) Although safe for normal use, this is just another reason to never, ever leave cooking oil
unattended during heat up and cooking.
Cooking Oil facts to Remember:
100% peanut Oil is considered a very stable cooking oil having a higher Smoke and Flash Point
temperature than other vegetable oils.
Some cooking oil is sold as a "blend" of vegetable and peanut oil.
Re-used Vegetable and Peanut Oil both have reduced Smoke and Flash Point temperatures.
As a result, Flash Point temperature of cooking oil ranges from 550˚F to 700˚F.
Remember; Think Safety and use Common Sense when frying with cooking oil/grease.
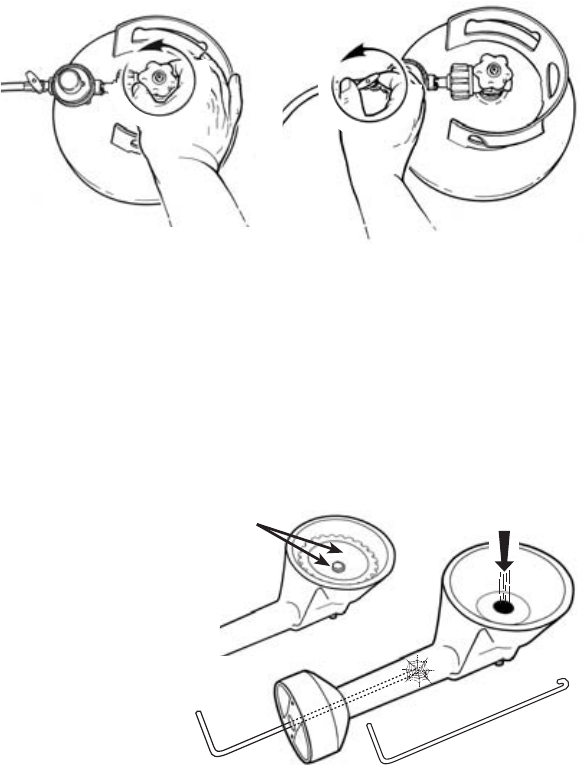
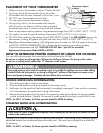
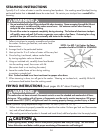
S-L-O-W-L-Y Turn
LP Cylinder V
alve One Full Turn
counter-clockwise
O
N
-
C
O
U
N
T
E
R
-
C
L
O
C
K
W
I
S
E
High Pressure
W
ater
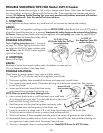
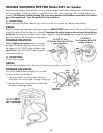
TROUBLE SHOOTING TIPS FOR Model #SP10 Cooker
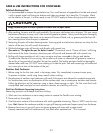
Sometimes the burner does not light or has a only a meager match flame. Other times, the flame blows
out, bur
ns yellow, or there is a flame inside the burner tube. These symptoms are common and easy to
remedy. The following Trouble Shooting Tips cover most questions and problems associated with outdoor
gas cooker appliances. Save this manual for future reference.
1. SYMPTOM:
Burner lights but the flame remains very small and will not increase for heat-up and cooking.
CAUSE:
Both LP cylinder and regulator couplings contain an EXCESS FLOW safety device that shuts off 90 percent
of gas flow should the hose be cut or severed. Sometimes this safety device can be activated when lighting
the burner. Opening the cylinder valve and/or regulator valve too quickly can create the rapid flow of
gas that activates the excess flow safety device.
POSSIBLE SOLUTION:
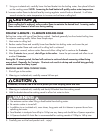
Repeat Lighting Instructions steps 1 through 6
on page 16. Follow lighting instructions and
be certain to S-L-O-W-L-Y open cylinder valve
one full turn, then S-L-O-W-L-Y open regulator
valve when lighting.
2. SYMPTOM:
Burner will not light .
CAUSE:
Blockage in burner from insects, spider webs, dirt dobber or wasp nests and debris.
This is a frequent problem in the Deep South.
POSSIBLE SOLUTION:
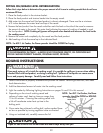
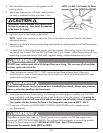
Clean burner to remove spiders, insect nests and other debris.
1. Turn gas OFF at LP cylinder valve and at regulator control knob.
2. Disconnect regulator hose assembly from burner and remove air control shutter.
3. Turn cooker frame upside down. Disconnect retaining nut from burner support bar, then remove
burner from frame.
4. Loosen and disconnect central bolt from burner
and remove flame spreader from burner cup.
NOTE: Wear eye protection when cleaning burner.
5. Use a narrow bottle brush or a stiff wire bent into a small hook
to run through the burner tube. Push the bottle brush or bent wire
back and forth through the burner tube.
6. Hold the burner with the tube facing down and spray water
from a garden hose into the opening in the burner cup.
7. It may be necessary to repeat steps 5 & 6 until water flows freely out of the burner tube.
8. Wire brush entire surface of burner to remove food residue and dirt.
9. Wire brush bottom of flame spreader and side ports to be certain all grooves are free of debris.
10. Re-assemble flame spreader and air shutter on burner. Reinstall burner, heat shield and locking nut
on support bar inside cooker stand. Re-connect hose to burner.
11. If burner is damaged, obtain a replacement burner. Model BG10 Burner for #SP10 Cooker
28
Remove bolt and
flame spreader
4
6
Stiff Wire
with Hook
BG10
Bur
ner
O
N
-
C
O
U
N
T
E
R
-
C
L
O
C
K
W
I
S
E
S-L-O-W-L-Y
T
urn Regulator Valve ON
counter-clockwise
null
  • Add more products to collection
  • Add more products to collection
  • Add more products to collection
  • Add more products to collection
  • Add more products to collection
  • Add more products to collection
  • Add more products to collection
-

Find a Product