
0
Owner's of the Bayou Classic Fryer 700-701 gave it a score of 0 out of 5. Here's how the scores stacked up:
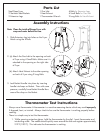

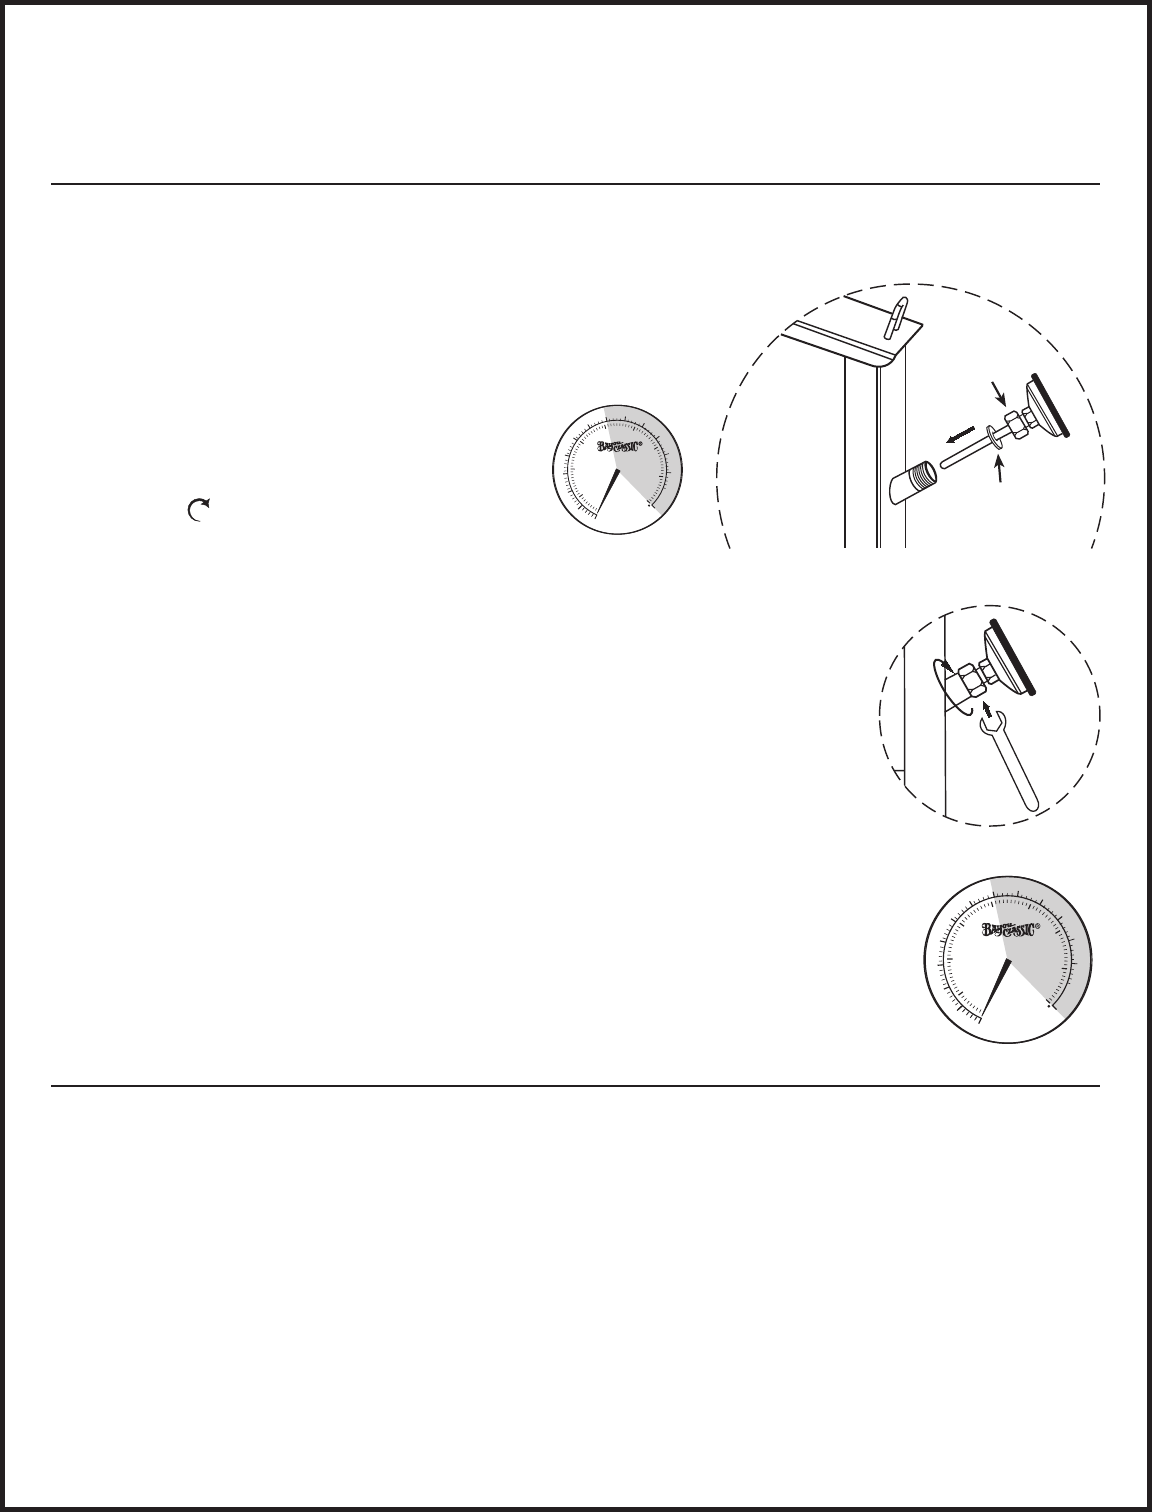
Thermometer Assembly Instructions
3. If the needle stops at a low temperature (i.e. 200°F); this indicates the thermometer has been
compromised and is not working properly. If so, discard the thermometer and call
1-800-864-6194 (Monday - Friday 8am - 5pm, Saturday 9am - 2pm CST) for assistance.
Note: Do not attempt frying if the thermometer is not working!
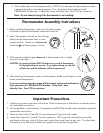
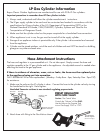
1. Before installing thermometer, make sure the rubber gasket
is located on stem of thermometer underneath brass nut.
2. Insert Thermometer into hole on front of fryer.
Make sure the thermometer face is in the
upright position. Gently turn the brass nut
clockwise until thermometer is secure.
3. With wrench provided, tighten brass nut of thermometer until it is tightly
secured to Fryer Stem.
4. After attaching Thermometer, make sure thermometer needle is pointing to or near
actual outside temperature.
If you are uncertain about any aspect of thermometer testing and attachment or
fryer operation call 1-800-864-6194 (Monday - Friday 8am - 5pm,
Saturday 9am - 2pm CST) for assistance.
F
I
R
E
H
A
Z
A
R
D
200
350
150
100
250
50
50
150
400
˚C
750
˚F
TURN
OFF
GAS
400
10
F
I
R
E
H
A
Z
A
R
D
200
350
150
100
250
50
50
150
400
˚C
750
˚F
TURN
OFF
GAS
400
10
Upright Position
CAUTION: Be certain to tighten ONLY the brass nut on stem of thermometer.
Do Not tighten top nut on stem. If you tighten the top nut, the dial
will also turn and the calibration will be compromised.
RUBBER
GASKET
BRASS
NUT
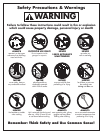
1. Appliance must be in open area with at least 10 feet of clearance in all directions to nearest structure
or combustible construction.
2. No combustibles or roof overhead. The appliance shall NOT be located under overhead unprotected
combustible construction.
3. There must be at least 2 feet (24") of space between LP gas tank and cooker.
4. Locate the LP gas tank "upwind" from the appliance. The LP gas tank and appliance must be
positioned so that any wind will direct most radiant heat away from the gas tank. This also helps
fire prevention by blowing the flames of a grease fire away from the gas tank.
Important Precautions


Find Your Products By Category
Please Login
