
0
Owner's of the Cuisinart Gas Grill CGG-180 gave it a score of 0 out of 5. Here's how the scores stacked up:
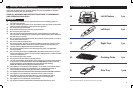
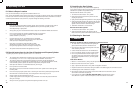

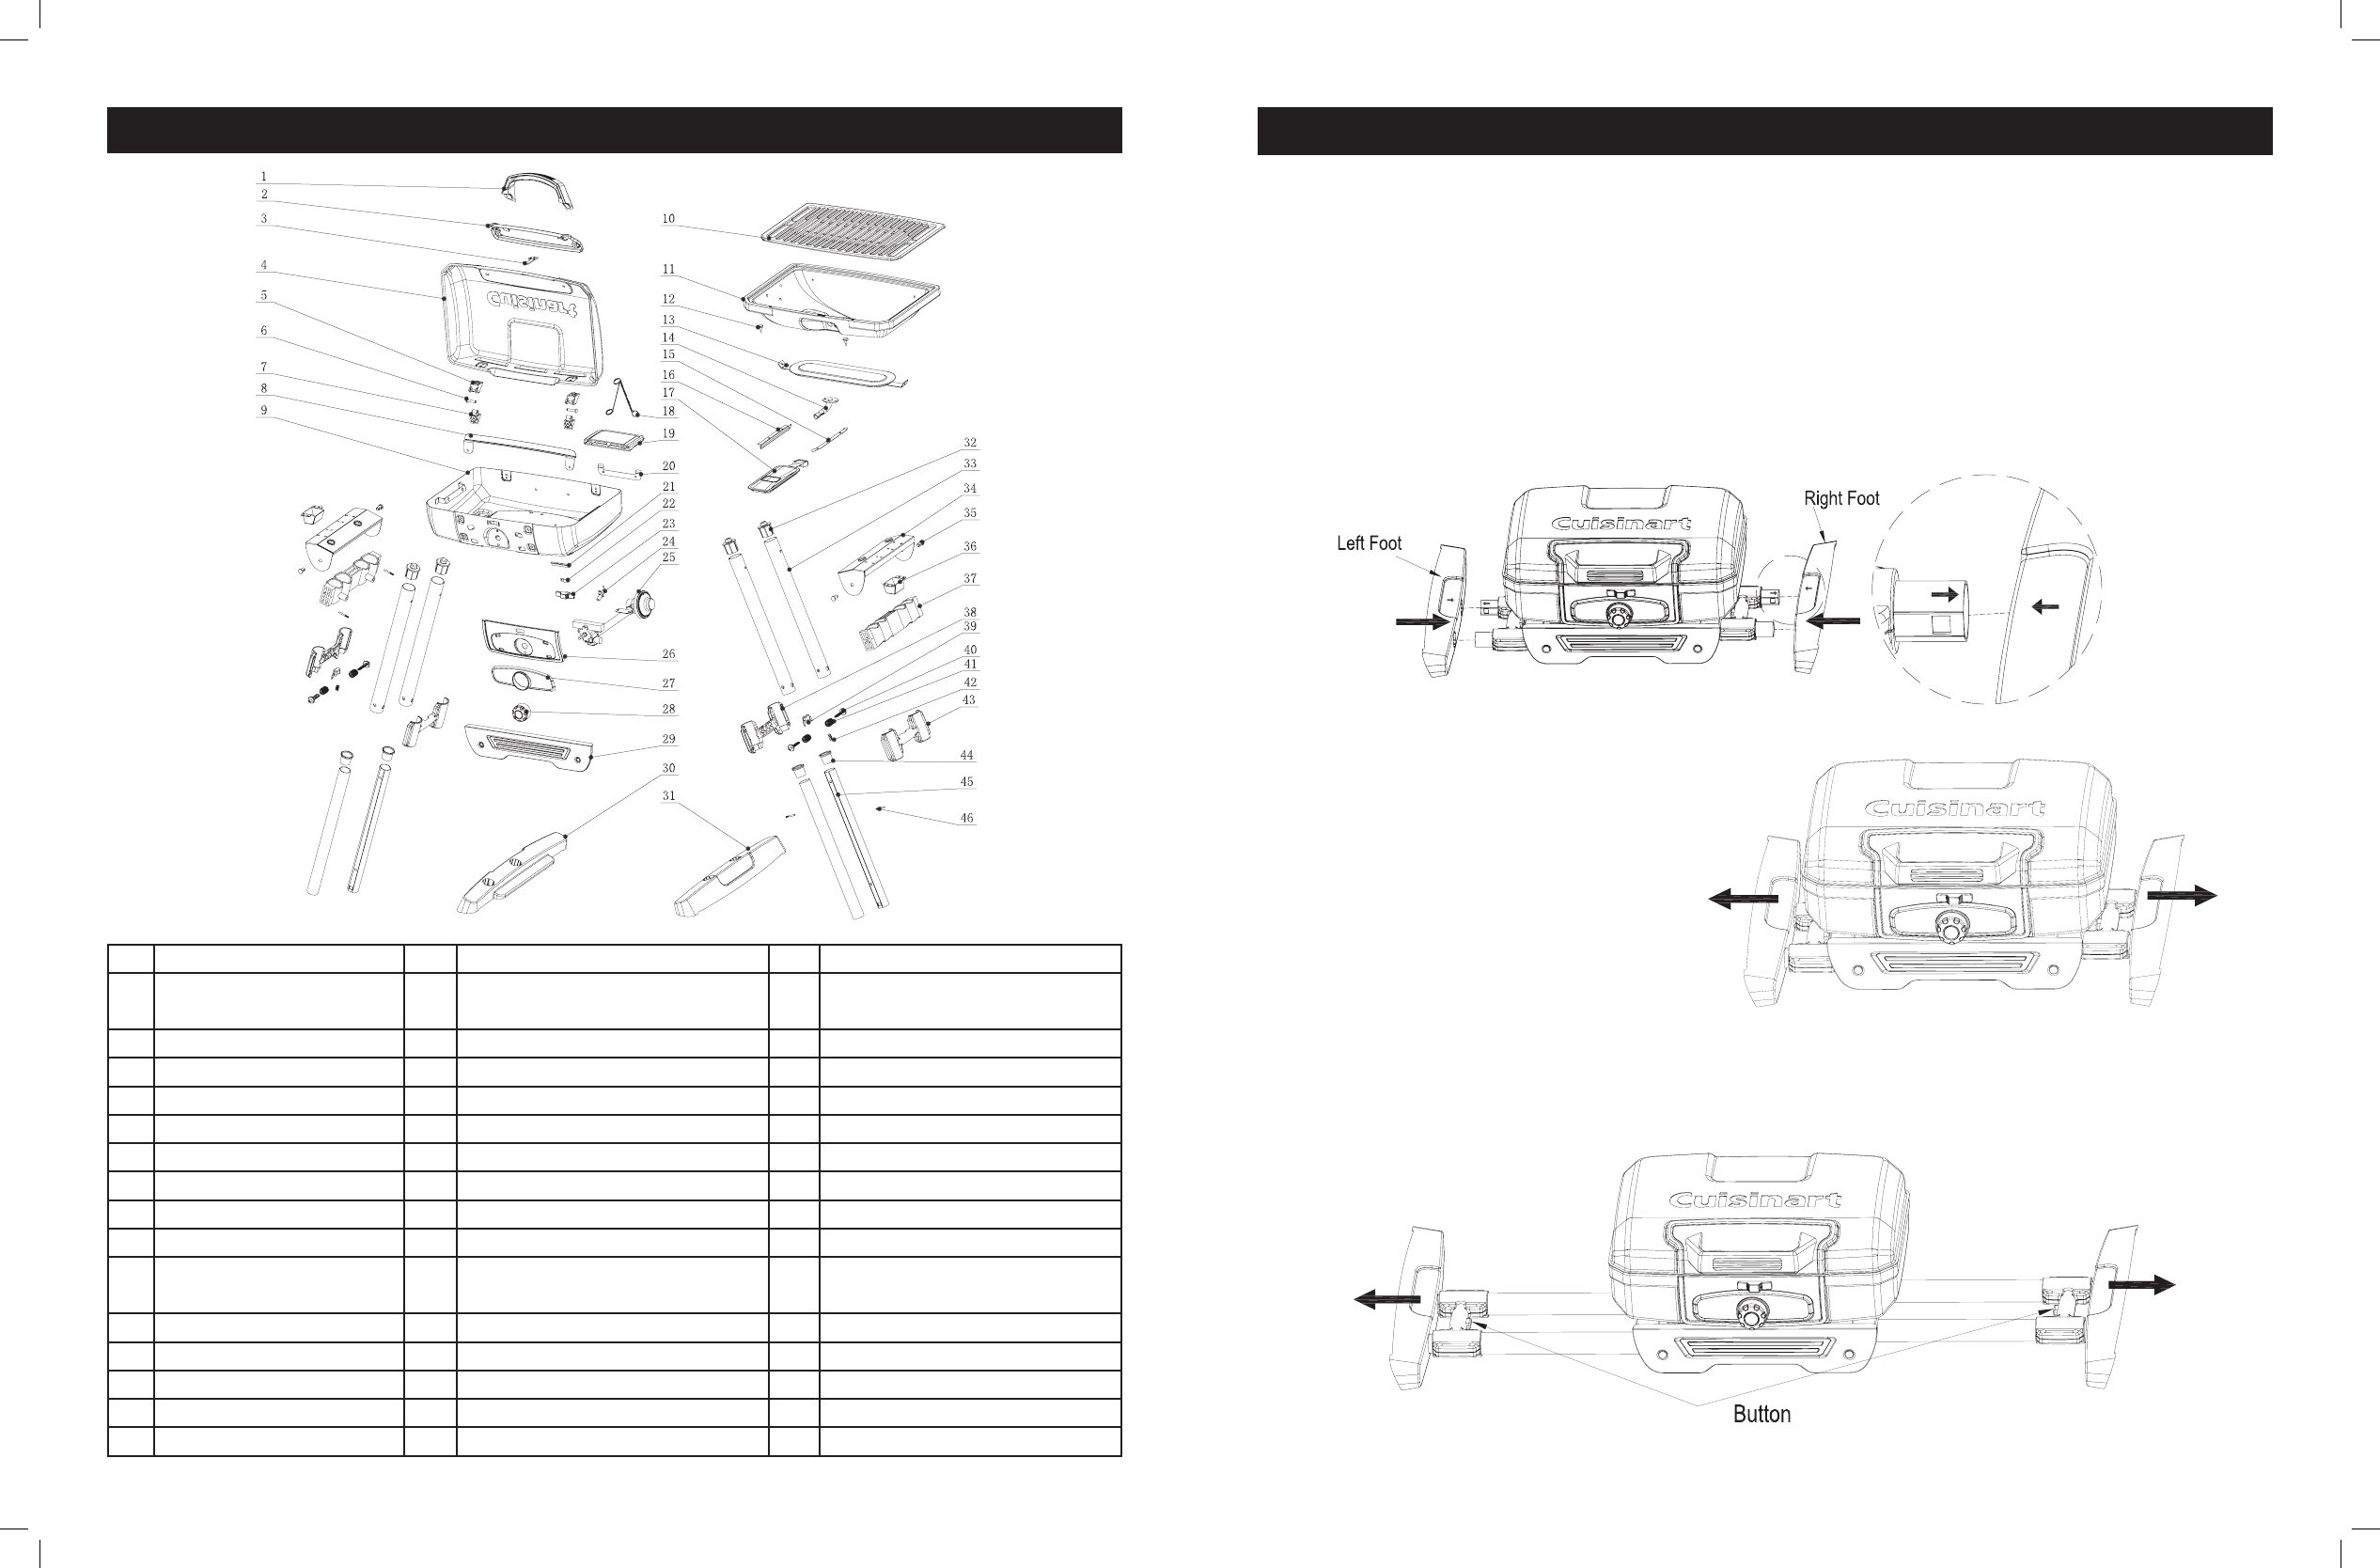
4. Assembly Instructions
Remove all the contents from packaging, and make sure
all parts are present before attempting to assemble!
6
7
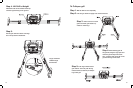
Step 1: Attach Feet
Put the left foot and right foot on the lower leg as illustrated. The feet and
legs have color coded arrows on them. When properly aligned, two ar-
rows of the same color will be pointing at each other.
Step 2: Extend Legs
to mid position.
Move the left foot and right foot
as illustrated until the end.
Step 3: Extend legs to high position
Push the button and pull
the legs out until the end.
If only mid height is desired,
skip to step 4.
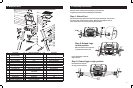
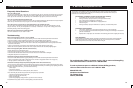
3. Exploded View
1 Lid Handle 17 Drip Tray Assembly 33 Upper Leg
2 Lid Handle
Base Assembly
18 Match Holder Assembly 34 Leg Assembly Bracket
3 Hook 19 Valve Protector 35 Upper Leg Pin
4 Lid Assembly 20 Match Holder Bracket 36 Leg Stopper
5 Upper Lid Hinge 21 Lock 37 Upper Leg Holder
6 Lid Hinge Pin Assembly 22 Lock Spring 38 Lower Leg Fixing Part
7 Lower Part Lid Hinge 23 Lock Handle 39 Button
8 Stopper 24 Electrode 40 Sliding Lock
9 Firebox Assembly 25 Gas Valve Assembly 41 Spring
10 Cooking Grate 26 Control Panel Assembly 42 Button Spring
11 Reflector Assembly 27 Control Panel
Face Plate
43 Upper Leg Fixing Part
12 Lid Cushion 28 Control Knob 44 Lower Leg End Cap
13 Burner Assembly 29 Decoration Panel 45 Lower Leg
14 Venturi Tube 30 Right Foot 46 Pin
15 Drip Tray Right Bracket 31 Left Foot
16 Drip Tray Left Bracket 32 Upper Leg End Cap


Find Your Products By Category
Please Login
