

0
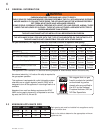
Owner's of the Napoleon Fireplaces Indoor Fireplace GVFL18N gave it a score of 0 out of 5. Here's how the scores stacked up:


12
W415-0809 / A / 05.10.10
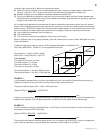
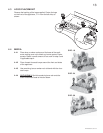
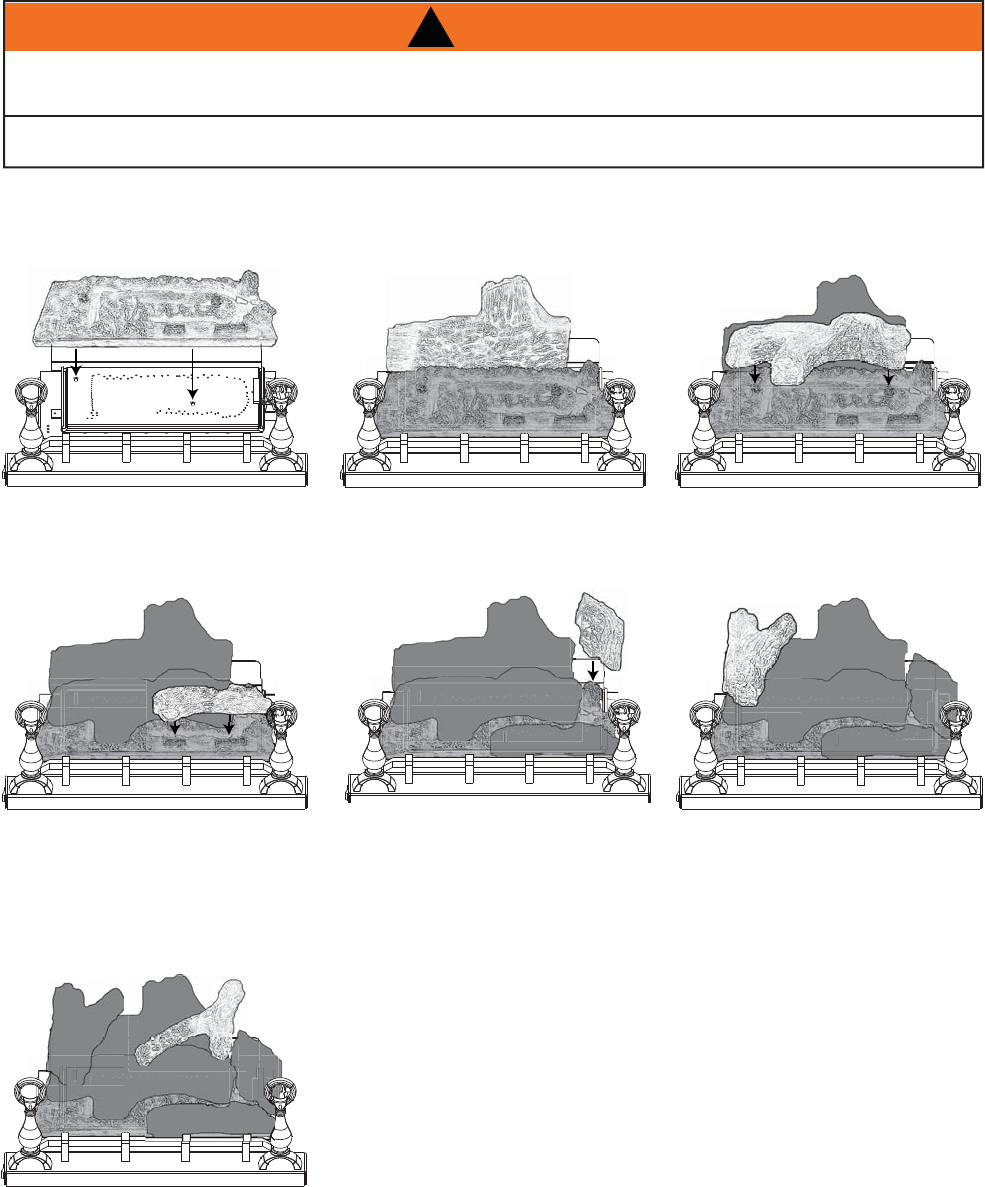
4.2 LOG PLACEMENT
Failure to position these logs in accordance with these diagrams or failure to use parts specifi cally
approved with this appliance may result in property damage or personal injury.
Do not place glowing embers, charcoal embers, vermiculite or charcoal lumps on this burner.
!
WARNING
Phazer
TM
logs, exclusive to Napoleon Appliances, provide a unique and realistic glowing effect that is different
in every installation. These logs are fuel specifi c. Do not interchange. Refer to the replacement parts list.
Failure to follow these log placement instructions may cause sooting.
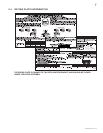
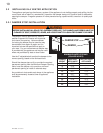
4.2.2 Place the rear log #1 onto
the locating studs on the
rear log support.
4.2.3 Position the holes on the
bottom of log #2 onto the
fi bre embosses shown.
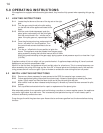
4.2.4 Position the slotted cav-
ities on the bottom of
log #3 onto the slotted
projections shown. The
charred face should be
facing in.
4.2.5 Position the bottom cavity
of log #4 onto the bridge
(top right corner of fi bre
burner cover) as shown,
with the charred face
inward.
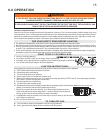
4.2.6 Position the pins on the
bottom of log #5 into the
holes on the left end of
log #1 and the left end of
log #2.
4.2.7 Place the end of log #6
on the right end of log
#1. The fork in the log
should straddle the knot
on top of the log #2.
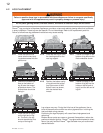
Log colours may vary. During the initial use of the appliance, the co-
lours will become more uniform as colour pigments burn in during the
heat activated curing process.
Positioning the logs improperly will cause fl ame impingement and
carboning.
Blocked burner ports can cause an incorrect fl ame pattern, carbon de-
posits and delayed ignition. Phazer
TM
logs glow when exposed to direct
fl ame. Use only certifi ed Phazer
TM
logs available from your authorized
dealer/distributor.
4.2.1 Place the fi bre burner
cover onto the two locat-
ing studs screwed into the
pan burner.


Find Your Products By Category
Please Login
