
3.8
Owner's of the Cuisinart Gas Grill CGG-180T gave it a score of 3.8 out of 5. Here's how the scores stacked up:
8
9
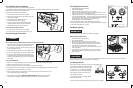
5.3 Installing the Gas Cylinder
(The propane gas cylinder is not provided with the appliance.)
A gas cylinder complying with the requirements listed in section 5.2 must be obtained before the grill can operate.
Connect the LP cylinder to the grill outdoors only.
Read and follow all direction on the cylinder.
1. Turn the burner control knob to “OFF” position.
2. Remove the protective caps from the cylinder valve and
coupling nut, if present.
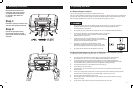
3. Ensure grill legs are extended as shown in
Assembly Instruction, Step 1 (page 6).
4. At rear of grill, push the cylinder into the threaded
regulator connector and turn clockwise until tight.
5. TIGHTEN BY HAND ONLY. Do not use tools.
Removal Of The Gas Cylinder
1. Turn the burner control knob to “OFF” position.
2. Turn the cylinder counterclockwise until it comes off.
5.4 Checking for Gas Leak
m DANGER
Check gas system for leaks to prevent fire or explosion hazard
1. The “Leak Check” must be performed before lighting the
grill and each time the cylinder is connected for use.
2. Do not smoke or allow other sources of ignition in the area
while conducting a leak test.
3. Conduct the leak test outdoors in a well-ventilated area.
4. Do not use matches, lighters or a ame to check for leaks.
5. Do not use grill until all leaks have been stopped. If you
are unable to stop a leak, disconnect the propane supply,
and call for gas application service or your local propane
gas supplier.
Leak Check Method
1. Make 2-3 oz. of leak solution by mixing one part liquid dishwashing soap with three parts water.
2. Make sure control knob is in the “OFF” position.
3. Spray or paint some leak solution on the cylinder and regulator connection.
4. Inspect the solution at the connections, looking for bubbles. If no bubbles appear, the connection is secure.
5. If bubbles appear, a leak is detected. Go to step 6.
6. Disconnect the cylinder from the regulator, and reconnect. Make sure the connection is secure
and no leak is found before using the grill.
7. If you continue to see bubbles,
DO NOT USE THE GRILL. Repeat the above process
with a different LP cylinder. If leaks are still present, contact the customer service center.
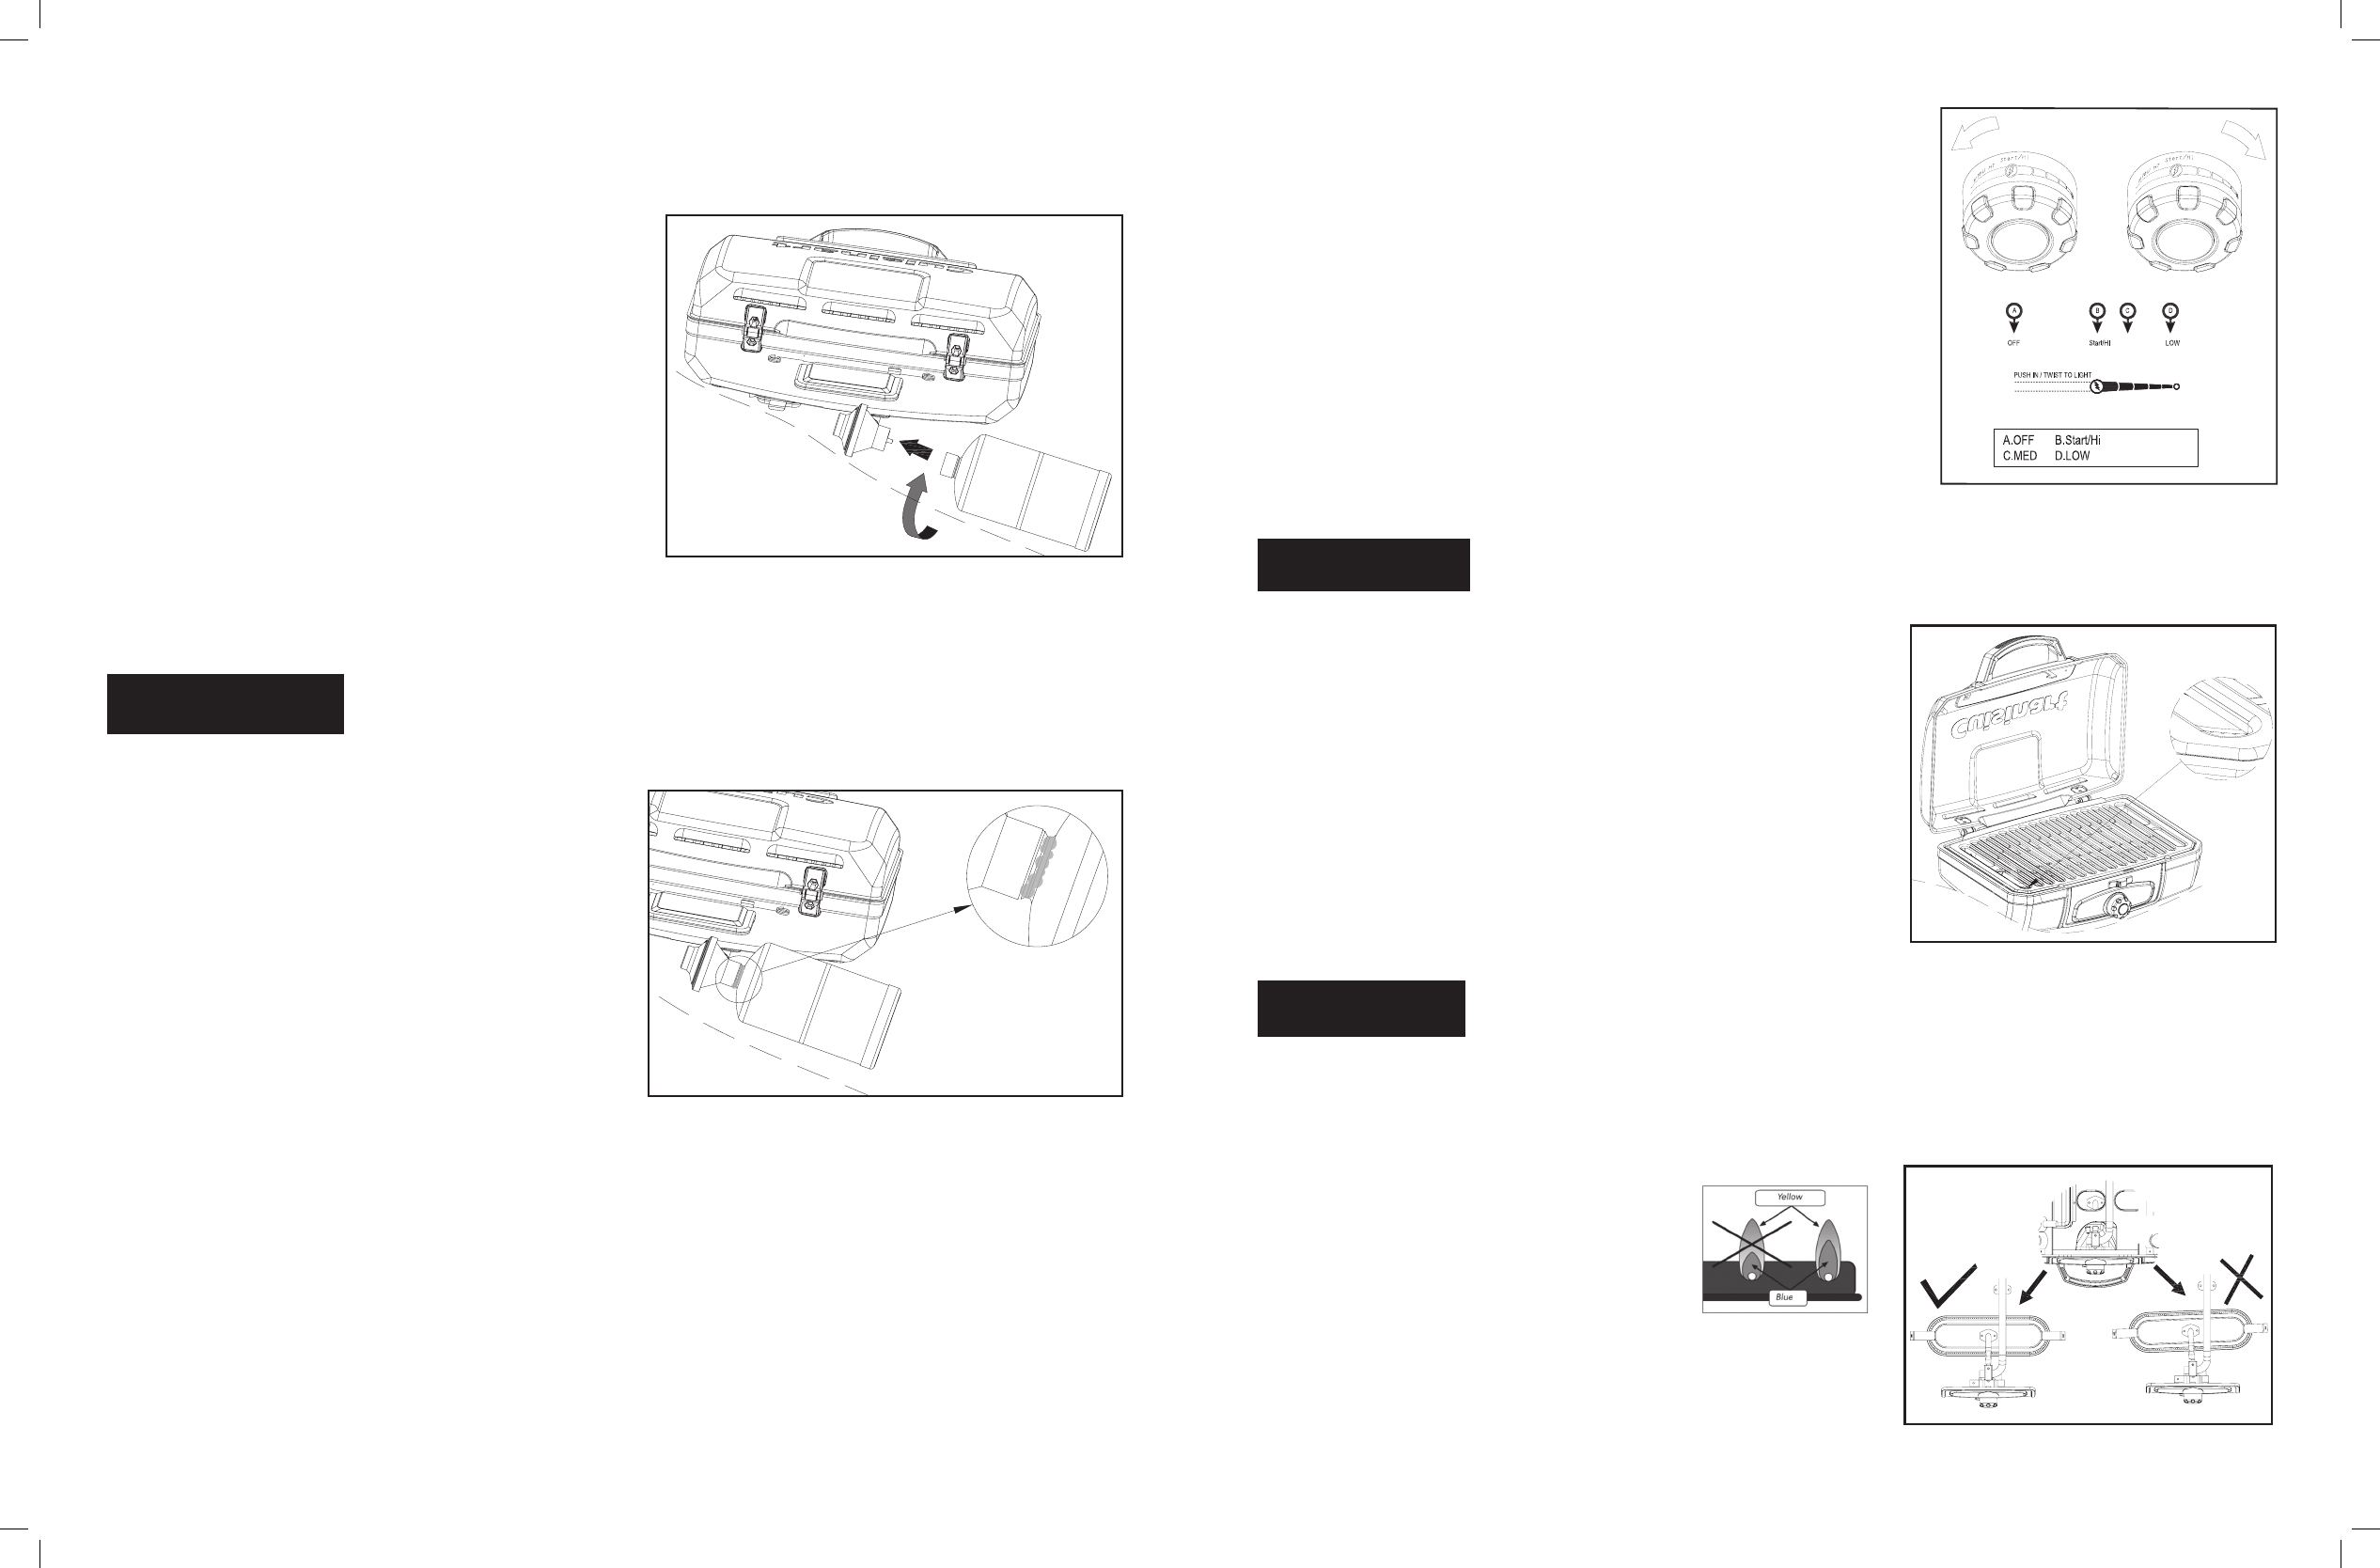
5.5 Lighting Instructions
1. Read all instructions before lighting.
2. Open lid during lighting.
3. Make sure the gas control knob is in “OFF” position.
4. Push the gas control knob and quickly turn counterclockwise to “HIGH”
position. The igniter will click and light the burner.
5. If ignition does not occur in 5 seconds, turn the gas control knob off, wait
5 minutes, and repeat steps 2 - 5.* Before cooking on this grill for the rst
time, operate the grill for about 15 minutes with the lid closed and the gas
turned on “HIGH”. This will “heat clean” the internal parts
and dissipate odor from the painted nish.
*Clean your grill after each use.
See Section 6.3 for instructions
*If the burner does not light, turn the gas control knob off and wait 5 minutes
to let the gas clear before you try again.
5.6 Match lighting
IMPORTANT!
A match lighting hole is located on the left side of the rebox.
Match lighting instructions:
1. Read all instructions before lighting.
2. Open lid during lighting.
3. Make sure the gas control knob is in “OFF” position.
4. Strike a long wooden match and position the burning match
through the match lighting hole in the left side of the rebox.
Place the ame near the bottom edge of the burner.
5. Push down and turn the burner control knob counterclockwise
to the high setting.
6. The burner should light. The ame will carry around the burner.
Allow grill to pre-heat with the grill lid closed for 2-3 minutes
before cooking.
mCAUTION:
Do not touch any hot grill parts. The outside of the grill bottom especially becomes very hot during use. Use protective
gloves to handle any parts that might become hot during use.
5.7 Using the Grill
Inspect the burner ame by looking through the match lighting holes.
A good ame should be blue with some yellow
tips coming from the burner holes. Yellow tips
on ames up to 1/4“ in height are acceptable
as long as no carbon or soot deposits appear.
During operation, stand to the side of grill
when opening the grill lid.
Do not expose any part of your body directly
above the cooking area.
The burner opening must be positioned properly over the valve orices.


Find Your Products By Category
Please Login
